Surface Design: Laser Engraving


    We were tasked with using our surface design studies to develop patterns for engraving on wood. Students where given free rein on what patterns to implement and were encouraged to take the project in any direction. I've decided to utilize this time to create a wood block pattern that I could stamp on to a paper and create a decorative pattern. 


As seen above the initial engraving was done on a basswood panel cut to a 4" x 4" square to be used as the template for the prints. The laser-engraving left a residue on the wood, At first I thought about clearing it with soapy water but decided to leave it so its pores would remain sealed. It saved me time as I no longer needed to apply a layer of enamel on the wood-block to seal it for the printing process. 


Finally, using a brayer I was able to apply black acrylic ink on the pattern and use it to stamp out the design on paper. 

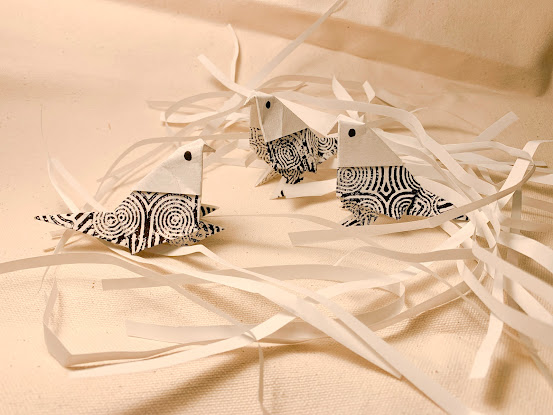
I used the pattern to create paper folded birds inspired by the stripes of a Black and White Warbler. The final result as seen below the paper birds have rotund patterns creating an illusion of a curvy and plump.


Source: Lisa De Leon


Comments

Popular posts from this blog

OBDF310 Milestone Project 1: Stacked Slices

         My current sliced model for this weeks blogpost. I wanted to test modelling an object in Rhino first and using the mesh as the starting point for the contour slices in grass hopper. I ended up experimenting on different extrusion depths and the vector direction for the slices.  Modularity of grasshopper allows for rapid iteration and gives me a couple of choices to pick from. I decided on the vector slices along the y-axis which gave me a very simplified version of the bird but still recognizable.  Rough model doesn't need to be detailed because the contour slices simplifies everything else.

REPLICATED/REMEDIATED: MOLD POSITIVES & MATCH PLATE

                   Last Supper 2023                  Medium: Optimistic Students, Instructor, Acrylic, Plaster, Tape                  Site-Specific Performance     We reached the end to this project and were building plaster mould's and finally some traumatic experiences with slip casting and lots of waiting. Good soup <3 We agitate plaster in water to facilitate an exothermic reaction that would lead into it solidifying. Its a great experience like making chowder or adding starch into boiling water except the water is freezing. Finishing this plaster mould.  Before slip casting ensure that the mould plates are fully dry, once that is complete start pouring up to the rim and wait for the clay to precipitate.  On the first try the clay did form around the plaster, mine but did not really dry but the first once is always di...

Milestone Projects

 First Definition                         Creating solid shapes from curves using loft Animation Attempting to animate 3d models within a specific track/path/curve Stacked Slices Creating a Sliced model of a penguin and experimenting with reductions in overall form Boundary Surfaces Patch Replicate/ Remediate Preparing a Model for 3d Printing and using it as a Master for Slip Casting and of course making the clay object through repetition.   Surface Morph Patch