
Reverse Engineered Objects: Intro


In this week's OBDF 200 class, students have been tasked with selecting 3 objects to reverse-engineer and eventually reconstructing through Rhino 7 a CAD software program. 

Although, I'm already fixated on just working on a single object mostly because of its underlying structure and mainly its circuit component. I would be reverse engineering a voxel-styled USB video game controller. I do think it's complex enough to work on and has a worthwhile form to study.
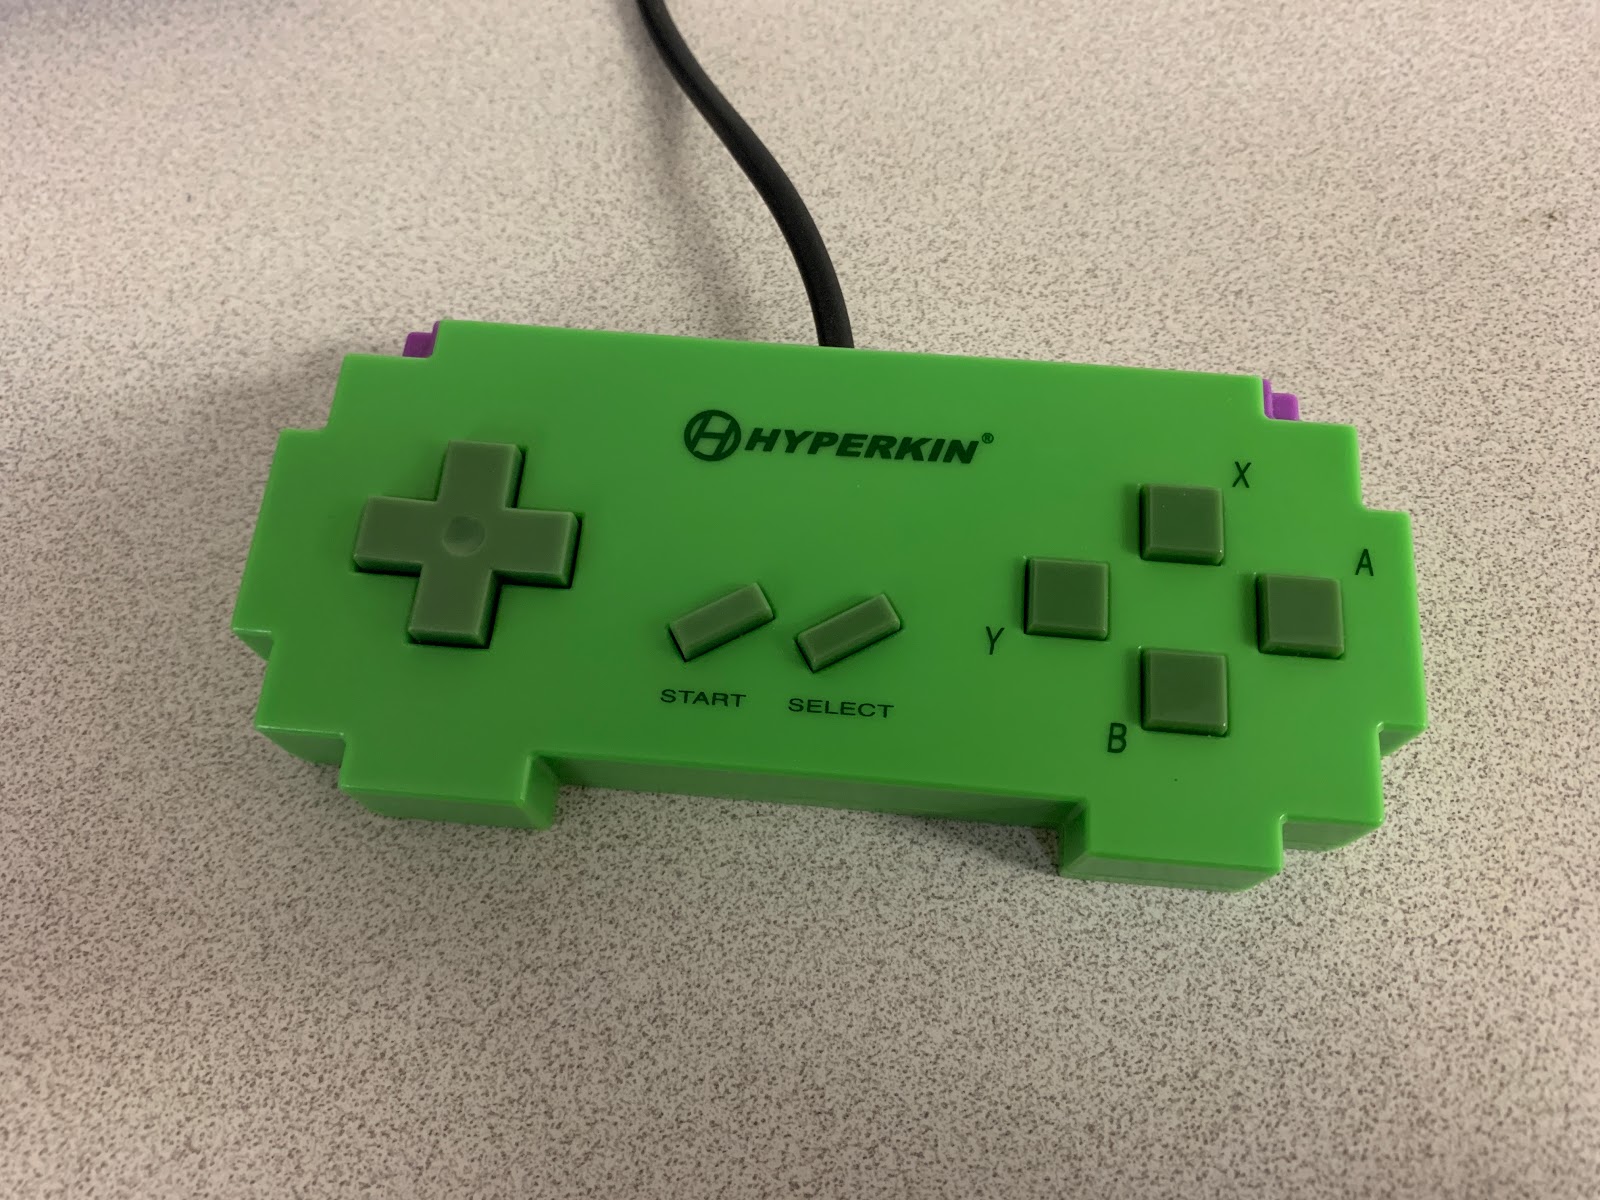
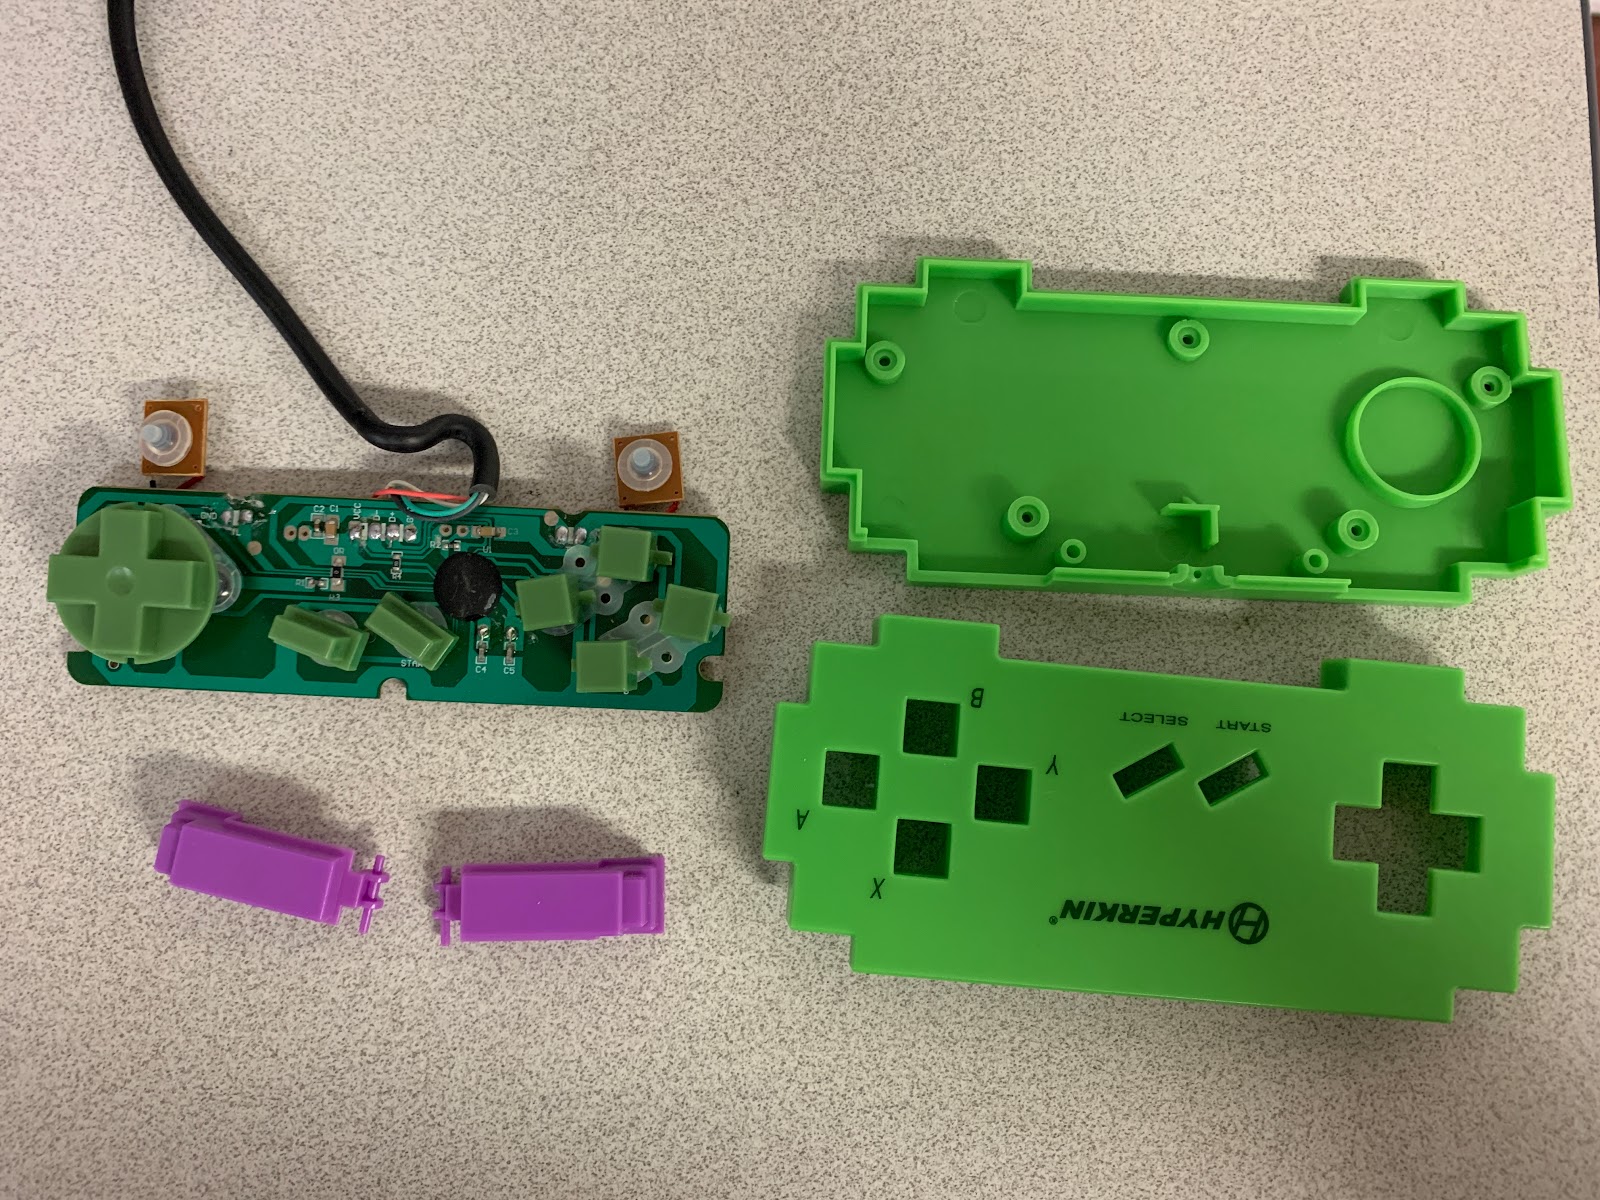

I'm mainly interested in recreating the circuit pattern, and I do acknowledge its complex angles, I may spend some considerable time recreating this part.


Back-up Object:


I think this clip is equally as challenging as the controller, I usually stray from curved angles. 


Comments

Popular posts from this blog

PO1: The Bespoke Object, Refining.

Week 2:  I pretty much spent the entire week modifying the model. Mostly to make it usable for patterning, and maybe to also have it ready for animation, but I might take a different route on that. It was possible to just use the draft model, but working from experience anything that is curved on an inflatable would have a tendency to straighten. Because air volume inside the soft structure would have a tendency to push on all directions. To mitigate this, I instead opted for a flatter structure that resembles a crocodile more than a salamander. I do appreciate the whimsy of the initial draft.   Tools Used: Nomad Sculpt, Blender, Rhino, Cozy Blanket. When designing models I tend to jump between software, Its easier to design soft and organic structures using mesh based modelling or sculpting. And I happen to have a variety of choices to choose from, each with a with a specific strength but none can do it best.  Below is my workflow on Nomad Sculpt which is an I...

OBDF 310 Milestone: Stacked Slices Laser cut Final

  This week in my Object design class, we were able to finalize out designs for laser cutting slices. My penguin model has gone through a couple of design adjustments mostly to have a cleaner and readable structure. simplifying the model makes it easier to distinguish, spherical curves on the original brep reference doesn't seem to provide appealing slices so I decided to go with a more geometric form. Once processed through grass hopper I didn't have a need to include wings because the tapered form still translates to something that appears like a wing.   On the left are the initial slices, the right is the cleaner side decided to mirror to create a more readable model. Above is the layout for laser cutting, I ended up layering the cut-outs manually because the grid method shown in last weeks class was quite troublesome. I just couldn't figure out how to pull of the grid placement on vector direction and didn't want to spend too much time confusing myself. (The penguin...

Algorithmic Surface Modelling

  This week surface morph animation and some extra stuff.  Starting out with a divided curve I was able to use it determine points for circles and then using said circles to loft a structure. I then utilized the random numbers to offset the radius for each section in the loft and by utilizing "replace item" I was able to move a circle around the geometry. To show this variating animation without changing the seed values in the random numbers node. Bonus: Sending Grasshopper data via OSC/UPD to other programs I really wanted to use the program in conjunction with my main creative tools just to give me more reasoning to use grass hopper. You can utilize geometry in grass hopper and use them on other programs like MAX msp and Touch Designer for live visual effects or any other use cases. But as a caution try to re-mesh the models or simplify,  because grasshopper uses a lot of data and sending them live can cause it to crash if the models are too complicated.  Geometry ...